1/4 yard of felt
Ribbon - at least 4-1/2"
Rotary cutter with a pinking blade or pinking shears
Ready to start?
For a gift card size:
Cut felt 5-1/2" x 4-1/4"
Cut ribbon 4-1/2"
For a gift certificate size:
Cut felt 7-1/2" x 8"
Cut ribbon 7-3/4"
Once your pieces are cut, we will add the ribbon.
For the gift card size:
Measure down 1/4" and pin ribbon to felt.
For the gift certificate size:
Measure 1" down and pin ribbon to felt.
Sew your ribbon to your felt:
Trim your threads and any extra ribbon.
Fold felt in half with the wrong sides together (I know this seems backwards, but we will sew again to encase the ends of the ribbon).
Sew down each open side with the smallest seam allowance that you can manage.
Clip your corners and trim your threads.
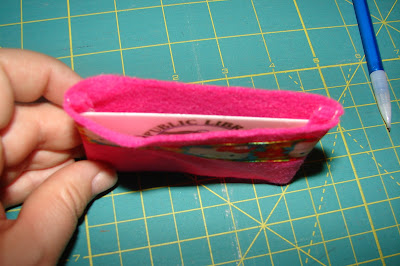
Now turn the holder inside out. It should look like this:
Sew sides of the holder again, enclosing the raw edges of the ribbon.
Turn right side out and you are ready to add your gift card!
As an optional finish, you can pink the top edges like this:
Once you give your gift card or certificate, these holders can be reused.
The gift card size can be used to hold:
Library Cards
Store Rewards Cards
Bus/Subway Cards
The gift certificate size can be used to hold:
Receipts
Coupons
Parking Vouchers
Thanks for visiting! I hope that this tutorial makes your special gifts a little more special!


like the tutorial and the card holder..thanks for sharing it as i might need it when use this design for my own..thanks for sharing it with us.
ReplyDelete